
Did you buy a beautiful home that looks a little less than beautiful on the outside? We sure did. We love our tri-level mid-century home but the outside bricks left a lot to be desired. They were very very red.
We talked about using German Schmear on the outside of the house and really like the look, but upon researching, learned that it would need to be touched up every 8-10 years.
Limewash, on the other hand, became part of the brick and was fairly permanent. Who doesn’t love no maintenance!

What is Limewash?
Limewash is nothing more than crushed limestone mixed with water to create a paint.
Limewash seeps into the pores of brick and is absorbed and becomes a part of the brick itself. Unlike paint or German Schmear which need to be kept up, limewash is as durable and long-lasting as anything on the market. Eventually, it will weather, but you can add another layer of limewash and you are good to go!
Limewash gives a lovely matte finish to bricks that you won’t find in German Schmear or Paint.

Why Limewash instead of Whitewash or Paint?
- Aside from longevity, Limewash is much more friendly to the enviornment as it is a natural substance. If it gets on surrounding plants it is easily washed off with water.
- The best reason of all is how cheap it is! You can make gallons of batches of limewash for less than $10 with a 50-pound bag of lime and some water. (Here is a link to hydrated lime, but it is much cheaper to buy locally.)
I will say that I could write a small book on this project- there were many steps, many hours spent but the end result was well worth it.
You can hire someone to limewash your home, but it is a fairly straightforward DIY project, so if you have energy and time, here is how to Limewash Brick.
Step 1 to Limewash Brick
You need to make sure the brick you are going to limewash is completely clean. Use a power washer to clean off leaves and other gunk that gets on bricks. This doesn’t have to be crazy, just get off obvious gunk.
Step 2 to Limewash Brick
You need to mix the hydrated lime, and water together in a bucket. You will mix it in a 70/30 ratio. You want 70% water to 30% lime.
Be super careful when mixing as lime is caustic and will burn you if you get it on you. Wear a respirator or N95 mask and goggles as well as clothes that cover up your skin
.
Mix the lime and water with a drill paddle or a good paint stir stick. The mixture will be watery, and not like paint.

(If this seems too overwhelming there is a Limewash paint on the market that is mostly already mixed. It is good quality but much more expensive!)
Step 3 to Limewash Brick
- First, wet your brick. It will help the limewash go on evenly. Work in sections by wetting it and applying the limewash.
- You are going to apply the limewash with a brush. The best kind of brush is actually an inexpensive bristle brush, but you can use a sponge or even your hand for smaller areas. You will need to get the mixture on every brick so don’t be afraid to use a lot.

- The mixture is thin, but give it some time to dry before you decide if you need to do another coat.
- Make sure you are using gloves to protect your hands from dripping lime.
(I know of a few people who have sprayed it on using this inexpensive paint sprayer. It seems to work well, but I was nervous to do it.)
Step 4 to Limewash Brick
If you want your home to look weathered you will want to use the pressure washer again. It will take off bits of the limewash and give your home a weathered look.
Spray the areas that you particularly want to look aged like the edges.
If you want a whiter look that is more uniform you can skip this step.
Step 5 to Limewash Brick
Wait a day for the limewash to dry completely and assess the job you did. If you want it to be whiter you will need to do a second coat.
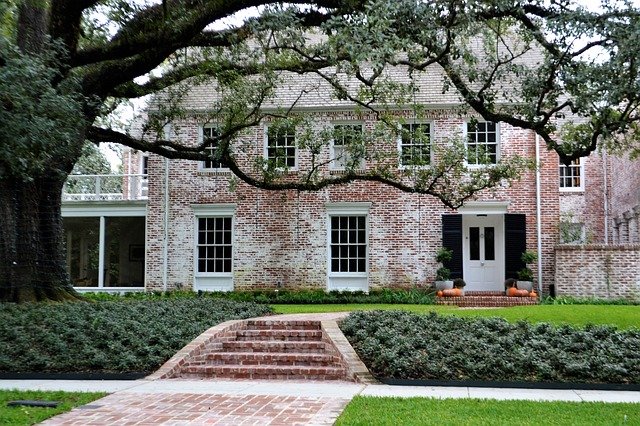
You can now decorate your home as you wish. Add colored shutters to break up the white, paint your railings to match, etc.
The best time to limewash your home.
You will have the most success limewashing your home if you pick a mild day with low humidity.
Make sure there is no rain in the forecast as that will ruin your limewash.
Make sure to have a few friends who are willing to help, as it can be an overwhelming task!
I hope this helps you to have the confidence you need to Limewash your brick house. This is a straighforward project that is easily done in a weekend or two.