
Black Concrete Countertops are fairly easy to DIY. You just need a weekend and some inexpensive supplies and you are one your way!
Concrete is one of the most multi-faceted material. It is often referred to as the ‘Meryl Streep’ of the industry; fitting in everywhere and absolutely killing the look! Somehow, concrete has made its way to the kitchen as well. Whether you want a farmhouse-inspired look, modern, or industrial, concrete countertops slay every design style.
Another great thing about a concrete countertop is that you can customize it in any color, form, and shape. It issuper easy-peasy to play around with. From neutrals to red and black. You imagine it and its done.
Did we tell you how budget-friendly concrete countertops are? Most cost between $200-$500 tops and you are done! Not kidding. These babies are super affordable and hence gaining a lot of popularity these days. If you are a design enthusiast who likes to change interiors very often or looking for some low-commitment options for your kitchen, unlike marble and granite.
Concrete is the solution. What makes it even more amazing is the easy process. Yes, we do agree that it’s a bit time-consuming process to make a DIY black concrete countertops for your kitchen, but it will be worth every penny.
So, here is a quick guide to make your own black concrete countertop.
Supplies you will need for Black Concrete Countertops
All these supplies are super easy to procure. Any local hardware will usually have all of these. What we would suggest is, you consult the tradesman from the hardware store to understand if there are any special instructions with these supplies.
– Ardex Feather Finish (As per your kitchen size)
– Fine, Medium and Coarse Sand Paper
– Putty Knives and Drywall Knives (In a few size variants)
– Disposable container for concrete
– Concrete sealer (Preferably food-safe)
– Paints
– Painter’s tape
– Paint roller and brush
How to install Concrete Countertops
- Sand your existing kitchen counter. Cement holds on to rough surfaces better. At this point, you would want to remove the sink to achieve a uniform finish. Use tape to keep the backsplash tiles from scratching. Once, your surface is prepared, just clean it with a damp towel and let it dry.
- Mix the cement with water in the ratio of 2:1. Only mix small portions at a time because it dries up and hardens real quick allowing you very little working time.
- Using a wide putty knife spread a thin layer of concrete. Try different sizes of knives to work around smaller nooks. You don’t have to be precise at this point. Let the first coat dry for 24 hours. And then sand it down using sandpaper before applying the second coat.
- While applying the concrete mix for the second time, try to maintain a uniform thickness. At this point, you can give shape to the edges as well. There are various concrete countertop edge forms, like waterfall, Z-shape, etc.
- After the final layer start sanding the top surface. This will take a bit longer and you might want to get help from your spouse or family. Perfect the surface using various thicknesses of sandpaper until you get a spick and span surface.
- Apply paint if you want a black concrete countertop or you can totally skip this step if you want the raw and natural concrete finish.
- The final step involves using a sealer. You can go with satin finish sealer if you want a shiny surface. Double and triple-check that this sealer is food-safe. If you cannot find them at your local store even a regular sealer would work as long as you always use containers and cutting boards.
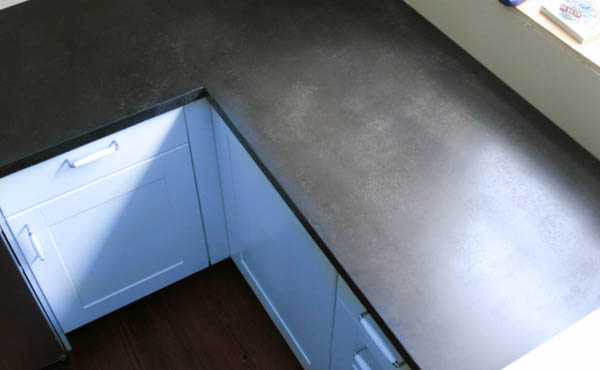
- Well, that’s about it! 7 Steps and you have your chic black concrete countertop ready. It is easy-peasy, affordable and super gorgeous!